Lessons
Our series are curated collections of lessons that walk through a specific topic from beginning to end. Series are a great way to learn a topic in a structured way.


Running Tests with the Test Runner
In this lesson, we'll learn about the various ways we can use the Ace CLI and Japa's test runner to execute all, some, or individual tests.


Our First Test
In this lesson, we'll write our first test with Japa and learn about spec files, as well as the three key components of crafting a good test: arrange, act, and assert.


The AdonisJS Testing Stack
In this lesson, we'll pull down the starter project for this series and use it to discuss how Japa is integrated within AdonisJS projects.


Why Bother Testing?
In this lesson, we'll discuss what the benefits of testing are, what we should focus on when testing, and give a brief introduction to this series.


AdonisJS Scenarios #3.0
Generating Dynamic OG Images with AdonisJS & Puppeteer
In this lesson, we'll learn how to generate dynamic Open Graph (OG) images using AdonisJS and Puppeteer. We'll also add rate limiting to limit the number of OG images being generated at once and discuss some things to watch out for.


Removing Indexed Documents when they're Deleted
In this lesson, we'll learn how we can remove documents from a Meilisearch index as records are deleted from our application. For this, we'll deindex author documents when a user deletes their account in our application.


Indexing Data as its Created
In this lesson, we'll learn how we can dynamically index documents in Meilisearch as records are created within our application. For this, we'll index a new author document when a user registers within our application.

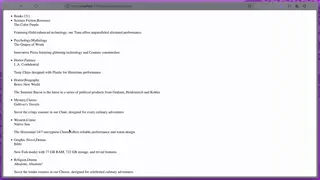
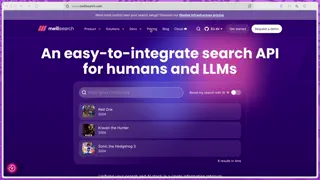
Performing a Multi-Search Across Indexes
In this lesson, we'll piece everything together into our final multi-search by searching across our book, genre, and author indexes within Meilisearch with a single call. We'll also discuss how we can get a single federated result array back if desired.

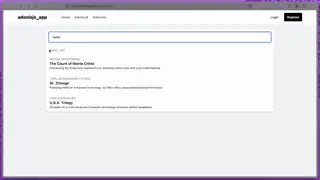
Making our Search Results Functional with Unpoly
In this lesson, we'll install and configure Unpoly to handle our search form's submission. We'll then server-render the search's results using EdgeJS and return it back as our response for Unpoly to swap in-place directly in the working document.

Performing Full-Text Search
In this lesson, we'll learn how to perform a full-text search with Meilisearch while also building the structural base for what will eventually serve as our multi-search autocomplete.

Creating a Command to Index Data in Meilisearch
In this lesson, we'll create an Ace CLI command to index our pre-existing data within our Meilisearch database so it is ready to search against. We'll walk our way through this and point out what to watch out for and how to view task errors.


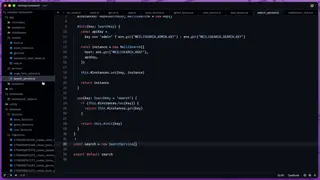
Creating A Meilisearch Service to Initialize Admin & Search Instances
In this lesson, we'll create a singleton Meilisearch service to simplify operations against our Meilisearch database by allowing us to specify whether we want to simply search or perform an admin authorized operation.


Seeding Fake Data to Index for our Multi-Search
In this lesson, we'll create a database seeder that will utilize our model factories to generate plenty of fake data to index and search against. We'll also discuss how we can easily batch insert bulk data in a single call.

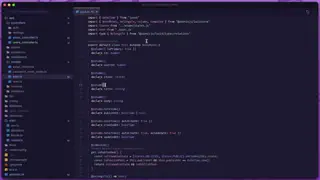
Creating our Database Migrations, Models, and Factories
In this lesson, we'll work on structuring our database by defining our migrations, Lucid models, and model factories to aide in generating fake data we'll later index and search against with Meilisearch.

Creating our AdonisJS Project & Setting Up our API Keys
In this lesson, we'll create our AdonisJS project and utilize our Jumpstart helper to bypass some set up work and keep the series on topic. We'll then integrate our Meilisearch API Keys into our project so they're ready to go!

Meilisearch Installation & Setup
In this lesson, we'll focus on installing and setting up the open-sourced version of Meilisearch locally on our machine for use throughout this series.


What We'll Be Building
In this series, we'll be building a completely server-rendered multi-search using Meilisearch, Unpoly, and a little AlpinzeJS. We'll setup the open-source version of Meilisearch locally, setup seeders and factories to build fake data to index, and more!

AdonisJS Quick Tip #25.0
How To Globally Alter Lucid's BaseModel
In this lesson, we'll discuss how we can globally alter Lucid's BaseModel to make global changes across all our application's models. We'll walk through globally changing the naming strategy and extras serialization as examples.
Showing 1 to 18 of 431 results