


Today we’ll see how we can get our user’s city, state, and country location information using their IP address and a from a free library and database called IP2Location.
Since, when working locally in NodeJS/AdonisJS our IP address is going to be localhost (127.0.0.1), I’ve gone ahead and grabbed three different IP addresses from my VPN for us to use as examples.
Chicago, United States: 107.150.29.169
Frankfurt, Germany: 45.87.212.78
Stockholm, Sweden: 149.50.216.74
What we need to do now is get the location through some service, and then we can compare the location via the service by its accuracy for the VPN's name for the IP address listed above.
Adding IP2Location
We’ll be using IP2Location, the lite version, as our service to programmatically fetch locations via IP addresses. The lite version is open source and free to use, though they do ask for attribution. They also have a professional version available via a one-time purchase if you need more in-depth information. You can find a breakdown of the differences here if you’re interested.
Brief aside, this lesson is in no way sponsored by IP2Location and I’m not making any compensation from them. They were just one of the few I could find with a free option that wasn’t heavily rate-limited.
Getting Our Database BIN
First, head into the lite version of their website and sign up for free. Once signed up, click your name in the top-right corner then click “Database Download” within the dropdown menu.

Within the Database Download page if you scroll down a little bit you should see the below.

Here they give us several options to download and we can download both the IPv4 and IPv6 versions. The test IP addresses we’re working with today are all IPv4, so we're just going to focus on that, but you can also download the IPv6 and swap between those two, depending on what version the IP is for the user.
Go ahead and download the “LITE IP-COUNTRY-REGION-CITY” database; grab the BIN version. Once downloaded, go ahead and extract the ZIP file, which will contain our BIN.

Copy the BIN file from your downloads and move it to the root of your project. I’m going to also go ahead and rename my BIN database “DB3.IPV4.BIN”

Accounting for the BIN After Building for Production
Next, in order to use the BIN in production, we’ll need it to reside with our build. The easiest way to do this is just to copy it over during our build process. We can do this by adding it to the metaFiles array inside our .adonisjs.json file.
// .adonisrc.json { "metaFiles": [ { "pattern": "public/**", "reloadServer": false }, { "pattern": "resources/views/**/*.edge", "reloadServer": false }, { "pattern": "DB3.*.BIN", "reloadServer": false } ], }Copied!
Now when we build our project for production, any files matching the pattern “DB3.*.BIN” will be copied into our final build folder.
Programmatically Fetching the User’s Location
For this demonstration, we’ll be exclusively working within our start/routes.ts file. Below is my starting point, you can copy/paste this into any project (so long as the route doesn’t collide).
import Route from '@ioc:Adonis/Core/Route' const ips = [ { name: 'Chicago', address: '107.150.29.169' }, { name: 'Frankfurt', address: '45.87.212.78' }, { name: 'Stockholm', address: '149.50.216.74' }, ] Route.get('/', async () => { const data = ips.map(({ name, address }) => { return { name, address, location: `TODO` } }) return data })Copied!
- start
- routes.ts
As you can see, we’ve got the IP addresses I listed earlier within an array and we’re just looping over them with the location currently set to “TODO”.
Installing IP2Location’s NodeJS Package
To simplify things further, IP2Location has a package we can use to read from the BIN in NodeJS, so let’s go ahead and install it.
npm i ip2location-nodejsCopied!
Then, we can import it at the top of our start/routes.ts file. While we’re here, let’s also import path, as we’ll need it in the next step.
import Route from '@ioc:Adonis/Core/Route' import { IP2Location } from 'ip2location-nodejs' import path from 'path'Copied!
- start
- routes.ts
Getting the Location from the IP Address
Finally, let’s grab the user’s location info using the IP addresses within our array.
import Route from '@ioc:Adonis/Core/Route' import { IP2Location } from 'ip2location-nodejs' import path from 'path' const ips = [ { name: 'Chicago', address: '107.150.29.169' }, { name: 'Frankfurt', address: '45.87.212.78' }, { name: 'Stockholm', address: '149.50.216.74' }, ] Route.get('/', async () => { const ip2Location = new IP2Location() const bin = path.join(process.cwd(), `DB3.IPV4.BIN`) ip2Location.open(bin) const data = ips.map(({ name, address }) => { const location = ip2Location.getAll(address) return { name, address, location: `${location.city}, ${location.countryLong}` location: `TODO` } }) ip2Location.close() return data })Copied!
- start
- routes.ts
Here we’re
Initializing a new instance of the IP2Location class.
Grabbing the BIN’s physical location using
pathon the root of our project.Passing that location into the
openmethod of ourip2Locationinstance.Grabbing the location info via
getAlland providing it with the IP address.Finally, we're closing the BIN once we're done with it.
With that, we’re now able to get the location for each IP address. You can customize the above as needed. As you can see by my results below, everything came out pretty accurate. Elk Grove Village is a village just outside of Chicago, then the other two match one-for-one.
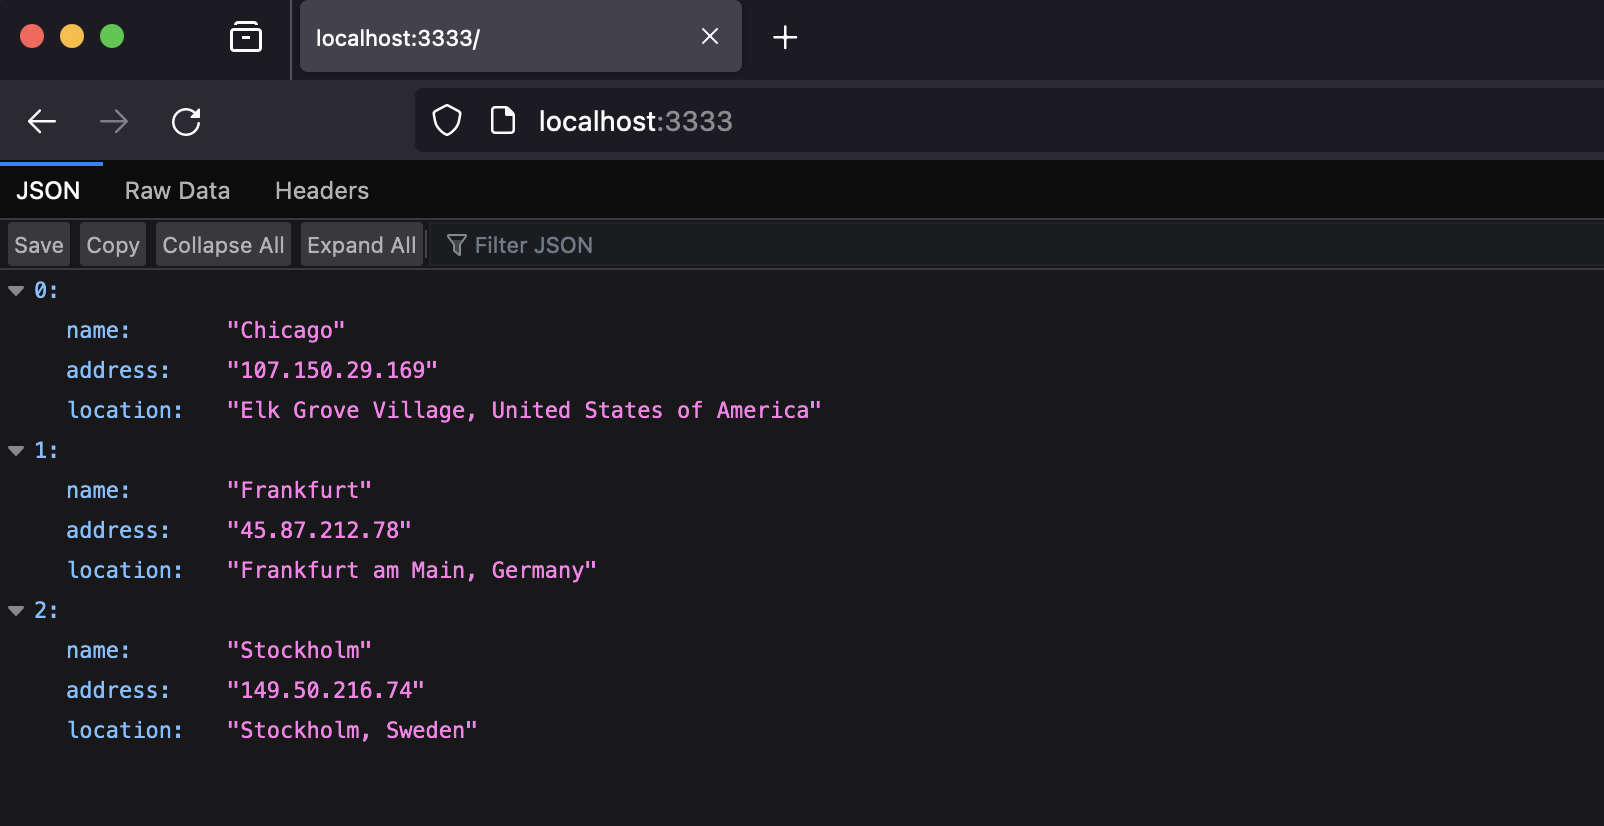
Now, these are bigger cities, so as you get to smaller, more finite areas, that’s where I’m sure the difference between the paid and free version of IP2Location will start to come into play. For our use case here today, and likely for most non-enterprise use cases, the free version suffices just fine.
AdonisJS Real-World Example
Note that when implementing this within your AdonisJS application the Request object has an ip method you can call to easily get the user’s IP address.
This flow would look something like the one below.
import Route from '@ioc:Adonis/Core/Route' import { IP2Location } from 'ip2location-nodejs' import path from 'path' Route.get('/', async ({ request }) => { const ip2Location = new IP2Location() const bin = path.join(process.cwd(), `DB3.IPV4.BIN`) ip2Location.open(bin) const location = ip2Location.getAll(request.ip()) ip2Location.close() return { city: location.city, region: location.region, country: location.countryLong } })Copied!
- start
- routes.ts
