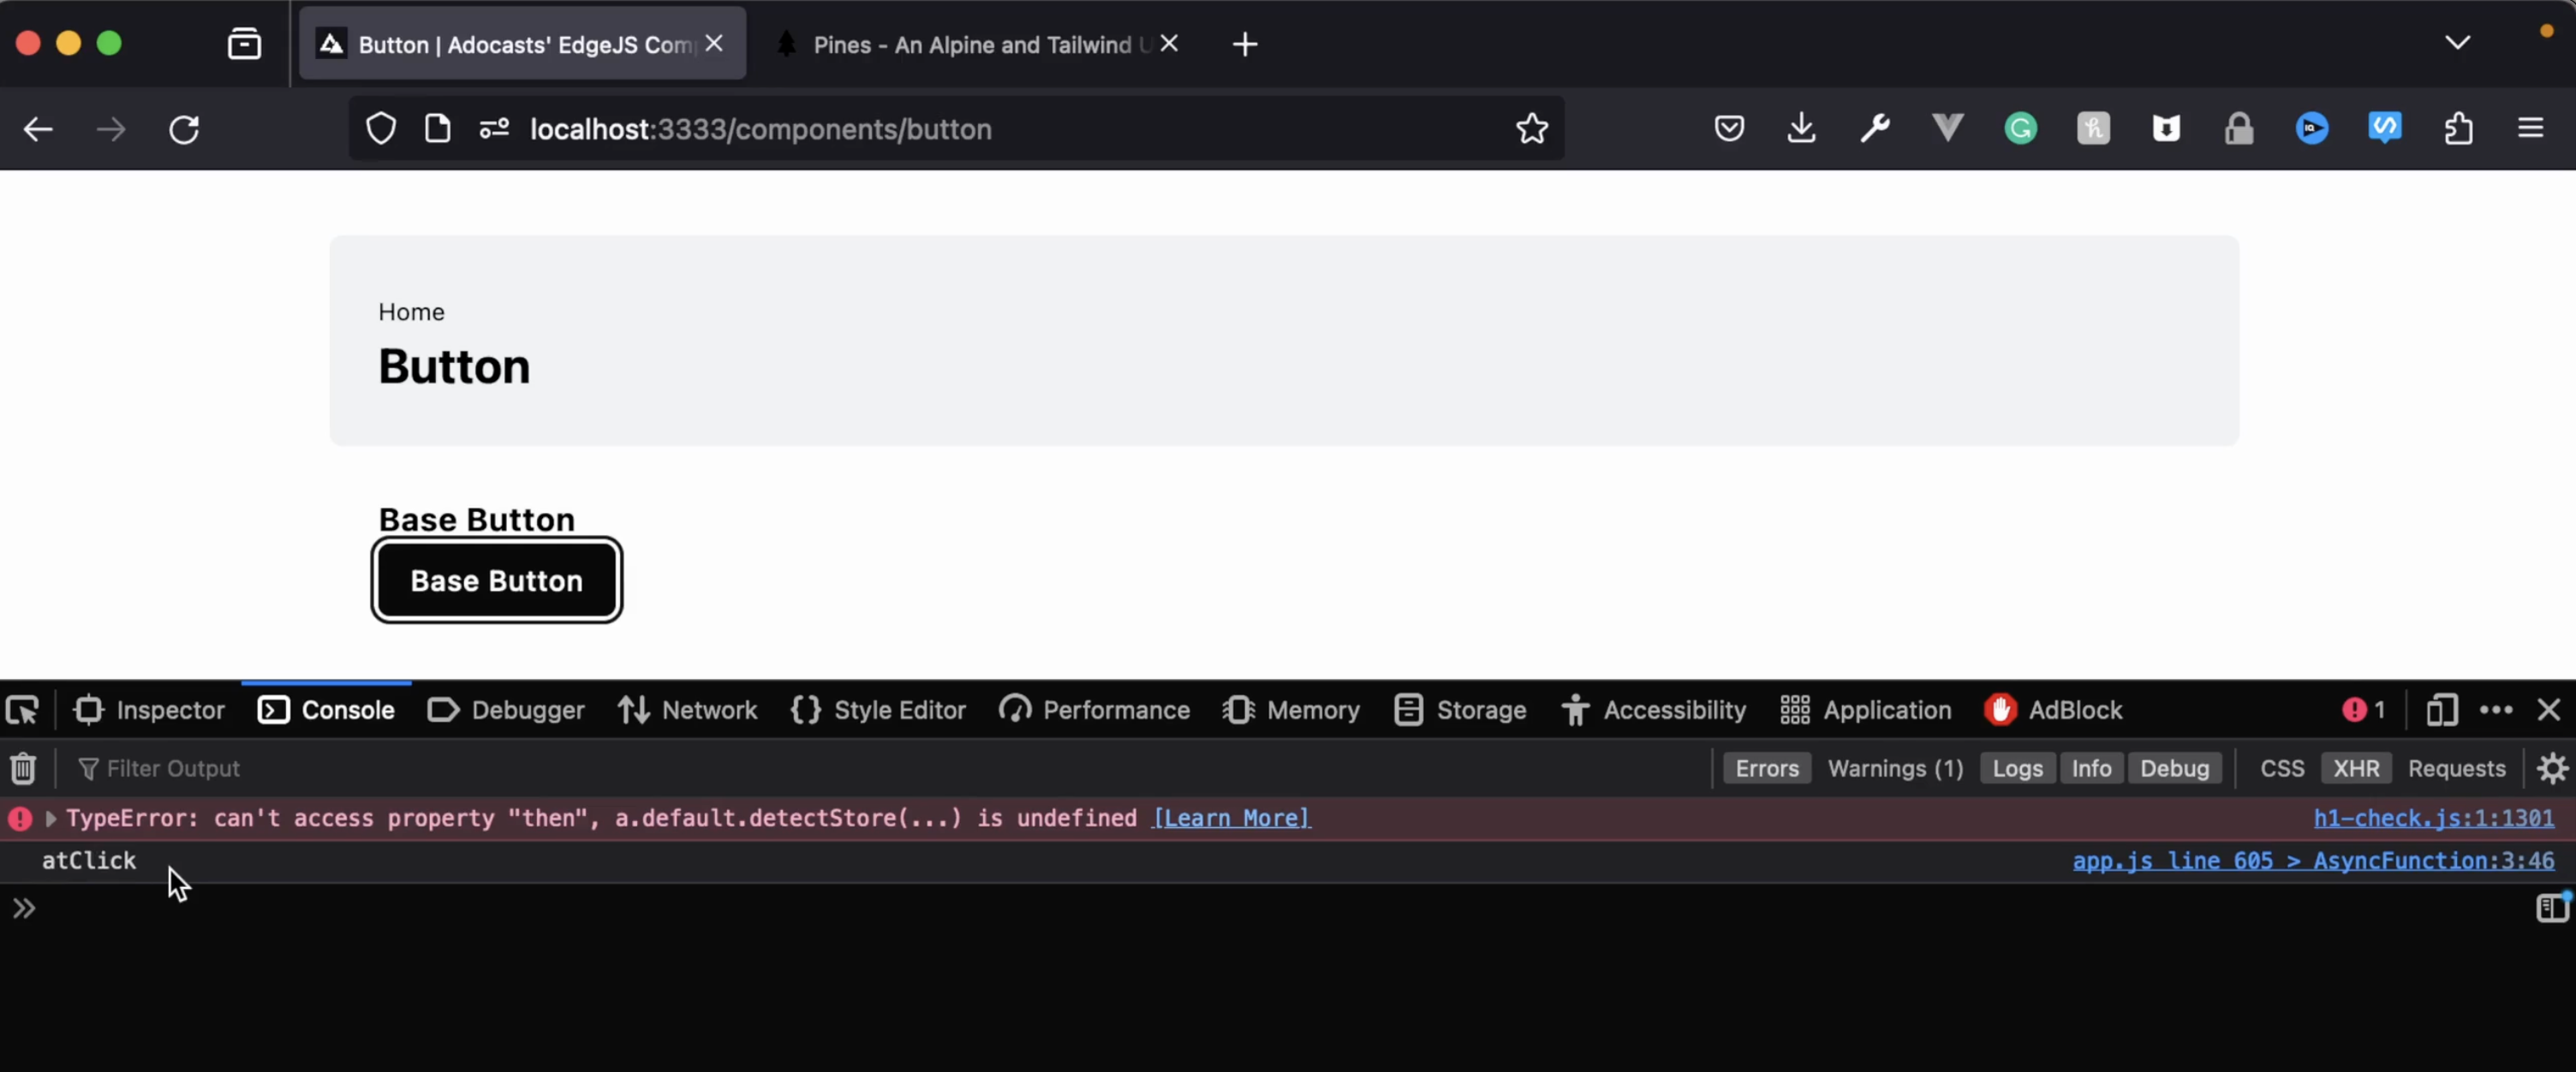
Before we start extending off our base button with our different styles, let’s first add interactivity so it’s not just a basic HTML button.
Event Propagation
First, let’s add x-data to the parent div of our button within our demonstration page. This will bind AlpineJS to the element, enabling Alpine state, events, etc. Meaning, we can also add a click handler to it.
@layout.app({ title: request.params().name }) <h3 class="font-bold">Base Button</h3> <div x-data @click="console.log('clicked')" class="mb-8 space-x-3 space-y-3"> <div class="mb-8 space-x-3 space-y-3"> @button() Base Button @end </div> @endCopied!
- resources
- views
- pages
- components
- buttons.edge
Currently, this won’t do anything in terms of our actual button. However, if we add x-data to our button as well, we’ll see that AlpineJS propagates the click even from our button, up to our parent div’s click handler.
<button {{ $props.serializeExcept(['type', 'class']) }} x-data type="{{ type || 'button' }}" class="{{ $props.class }} inline-flex items-center justify-center px-4 py-2 text-sm font-medium tracking-wide text-white transition-colors duration-200 rounded-md bg-neutral-950 hover:bg-neutral-900 focus:ring-2 focus:ring-offset-2 focus:ring-neutral-900 focus:shadow-outline focus:outline-none"> {{{ await $slots.main() }}} </button>Copied!
- resources
- views
- components
- button
- index.edge
Now if we jump into the browser, inspect our console, then give our button a click we should see “clicked” logged out.

As you can see, now that our button has x-data attached to it AlpineJS is now capturing the click event, propagating it up the AlpineJS tree where our parent @click handler is capturing the event and logging out.
This exercise demonstrates that you don’t have to have the handler defined inside our button component and we can instead rely on propagation to capture one-off events not directly related to the component’s functionality.
Direct Event Handling
There’s plenty of use-cases were we’ll instead want the event handler residing directly on our button. We can do this as well with two different approaches, either using the serialize prop approach or a separate atClick prop.
AtClick Prop
First we’ll want to conditionally add the Alpine @click onto our element if an atClick prop was passed into our button component.
<button @if (atClick) @click="{{ atClick }}" @endif {{ $props.serializeExcept(['type', 'class']) }} x-data type="{{ type || 'button' }}" class="{{ $props.class }} inline-flex items-center justify-center px-4 py-2 text-sm font-medium tracking-wide text-white transition-colors duration-200 rounded-md bg-neutral-950 hover:bg-neutral-900 focus:ring-2 focus:ring-offset-2 focus:ring-neutral-900 focus:shadow-outline focus:outline-none"> {{{ await $slots.main() }}} </button>Copied!
- resources
- views
- components
- button
- index.edge
Next, we simply provide a click handler as the atClick prop into our component. Note that we’re passing this click handler inside a string. This is so we can pass it from EdgeJS to AlpineJS and have it be a valid client side script.
@layout.app({ title: request.params().name }) <h3 class="font-bold">Base Button</h3> <div x-data @click="console.log('clicked')" class="mb-8 space-x-3 space-y-3"> @button({ atClick: `() => console.log('atClick')` }) @button() Base Button @end </div> @endCopied!
- resources
- views
- pages
- components
- buttons.edge
AlpineJS Prop
The next approach, and my personal preference, is to directly pass the @click as a prop and have $props.serializeExcept define it directly as an attribute.
For this, we don’t need to change anything inside our component. since we already have serialize except added.
<button {{ $props.serializeExcept(['type', 'class']) }} x-data type="{{ type || 'button' }}" class="{{ $props.class }} inline-flex items-center justify-center px-4 py-2 text-sm font-medium tracking-wide text-white transition-colors duration-200 rounded-md bg-neutral-950 hover:bg-neutral-900 focus:ring-2 focus:ring-offset-2 focus:ring-neutral-900 focus:shadow-outline focus:outline-none"> {{{ await $slots.main() }}} </button>Copied!
- resources
- views
- components
- button
- index.edge
Instead, all we need to do is directly provide the prop with a key of @click.
@layout.app({ title: request.params().name }) <h3 class="font-bold">Base Button</h3> <div x-data @click="console.log('clicked')" class="mb-8 space-x-3 space-y-3"> @button({ '@click': `() => console.log('atClick')` }) @button() Base Button @end </div> @endCopied!
- resources
- views
- pages
- components
- buttons.edge
Note that the @ character will invalidate our prop object, so we do need to define our key as a string.
The added benefit of this approach is that we can extend our handlers with chainable options. For example, if we want to stop the propagation behavior we walked through earlier, we could use the .stop chain on our click handler to tell it to stop propagation.
@layout.app({ title: request.params().name }) <h3 class="font-bold">Base Button</h3> <div x-data @click="console.log('clicked')" class="mb-8 space-x-3 space-y-3"> @button({ '@click.stop': `() => console.log('atClick')` }) Base Button @end </div> @endCopied!
- resources
- views
- pages
- components
- buttons.edge
Now if we run the above with our console open, you’ll see “atClick” gets console logged while “clicked” does not, because our propagation was stopped and this handler was never called.