Whenever it comes to communicating with our database in AdonisJS, we’re going to want to install Lucid, AdonisJS’ Object-Relational Mapping (ORM).
Lucid supports multiple Structured Query Language (SQL) based databases. All of the following are supported out-of-the-box with Lucid.
PostgreSQL
MySQL
MSSQL
MariaDB
SQLite
Database vs ORM
Installing Lucid will provide two different ways to communicate with our database: the Database module and the Lucid ORM.
Similarities
When it comes to performing queries, much of the base functionality is the same.
Both come with a query builder that’s built atop KnexJS.
Both support CRUD operations (creating, reading, updating, and deleting) and pagination.
Both support transactions, which allow you to easily batch together database alterations and either commit them or roll back them back.
Model Benefits
One major difference is that the Database module requires using the table and column names as they’re defined within your database. With Lucid, we’ll create models to describe our tables. These models allow us to normalize our database tables and columns. For example, by default Lucid normalizes snake_cased database column names to camelCase.
We can also use models to do the following, and more:
Add computed properties not defined in our database
Create query scopes to simplify or batch together query statements
Define, query, and reach through relationships
Create factories to easily build and populate test data
Add lifecycle hooks to perform some action before or after a query
When you add this all together, Lucid becomes a more concise way to perform CRUD operations against the database.
Here’s a quick example of a query with the Database module and another using Lucid.
// Database Example await Database.from('posts').where('is_published', true).select('*') // Lucid Example await Post.query().where('isPublished', true)Copied!
This example doesn’t really do Lucid justice in terms of its capabilities, but it alone gives a good example of the conciseness it provides over the Database module.
Database Benefits
The Database module really shines when it comes to altering the structure of our database or pre-populating it with data. It uses migrations to allow us to create tables and their columns. We can also use migrations to alter tables and their foreign keys, primary keys, indexes, and more.
We’ll have a few lessons specifically on migrations following this lesson.
The Database module also adds seeding capabilities, allowing us to create seeder files and execute them using the Ace CLI. Seeders are how we can pre-populate our database with specific data. For example, you might create a seeder to populate your roles table with your application’s roles.
Installing Lucid
Now that we have a basic understanding of what Lucid can do for us, let’s go ahead and get it installed.
npm i @adonisjs/lucidCopied!
Once that’s installed, we’ll next need to configure it into our project.
Configuring Lucid
Configuring packages in AdonisJS will perform the necessary actions required to properly get the package antiquated with our project. Doing so is as simple as running the following command.
node ace configure @adonisjs/lucidCopied!
Select Your Database Driver
Once you run that, it’ll ask you which database driver you plan on using.
˃ Select the database driver you want to use ◎ SQLite ◎ MySQL / MariaDB ◉ PostgreSQL ◎ OracleDB ◎ Microsoft SQL ServerCopied!
I’ll be using PostgreSQL throughout this series, but please select whichever you have installed on your system.
Project Changes (Automatic)
Next, Lucid will install the required dependencies based off our selection and stub our project with a few files and changes.
CREATE: config/database.ts UPDATE: .env, .env.example [wait]: installing: luxon, pg CREATE: database/factories/index.ts UPDATE: .adonisrc.json { commands += "@adonisjs/lucid/build/commands" } UPDATE: .adonisrc.json { providers += "@adonisjs/lucid" }Copied!
First, it’s going to add a database configuration file within our project. This will primarily be used to specify connections and rig up connection values to environment variables.
Then, it’ll add the needed environment variables for the database driver we selected. We’ll need to update these variables with our connection details, we’ll do that in a minute.
It’ll install luxon, a date-time package AdonisJS uses to make working with dates a lot more simple. It’ll also install whatever database package we selected.
Then it’ll create a database directory and stub it with an index factory file.
Lastly, it’ll add Lucid’s commands and provider to our
.adonisrc.jsonfile.
Project Changes (Manual)
Finally, it’ll ask us where we’d like to view instructions for a manual step that’s needed.
˃ Select where to display instructions ◎ In the browser ◉ In the terminalCopied!
Select whichever you prefer. In essence, we’ll need to add a few environment variable TypeScript definitions to our env.ts file. This will provide type safety to our new environment variables and also provide us with autocomplete support when reading from our environment variables.
Select whichever set is applicable for your database driver. For example, here’s PostgreSQL’s:
DB_CONNECTION: Env.schema.string(),
PG_HOST: Env.schema.string({ format: 'host' }),
PG_PORT: Env.schema.number(),
PG_USER: Env.schema.string(),
PG_PASSWORD: Env.schema.string.optional(),
PG_DB_NAME: Env.schema.string(),
Just paste those into your env.ts file at the root of your project. It should look like this when you’re done:
// env.ts import Env from '@ioc:Adonis/Core/Env' export default Env.rules({ HOST: Env.schema.string({ format: 'host' }), PORT: Env.schema.number(), APP_KEY: Env.schema.string(), APP_NAME: Env.schema.string(), CACHE_VIEWS: Env.schema.boolean(), SESSION_DRIVER: Env.schema.string(), DRIVE_DISK: Env.schema.enum(['local'] as const), NODE_ENV: Env.schema.enum(['development', 'production', 'test'] as const), DB_CONNECTION: Env.schema.string(), PG_HOST: Env.schema.string({ format: 'host' }), PG_PORT: Env.schema.number(), PG_USER: Env.schema.string(), PG_PASSWORD: Env.schema.string.optional(), PG_DB_NAME: Env.schema.string(), })Copied!
Environment Variables
The last thing to do is to update the values for our environment variables. The new variables should match the new environment variable definitions we added to our env.ts. So, open your .env file and update any values needed to successfully connect to your database.
DB_CONNECTION=pg
PG_HOST=localhost
PG_PORT=5432
PG_USER=postgres
PG_PASSWORD=password
PG_DB_NAME=lla5
For example, I needed to update PG_USER, PG_PASSWORD, and PG_DB_NAME to match my environment.
New Ace Commands
Before we end this lesson let’s run through the new Ace CLI commands Lucid added when we configured it within our project.
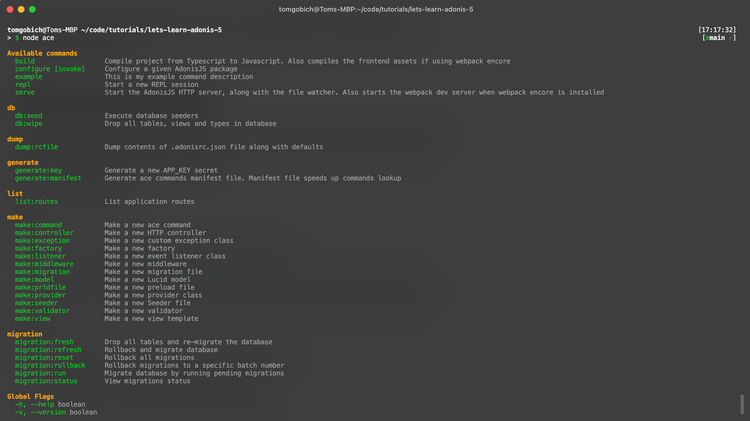
DB
db:seed- We can use this to run our seeder filesdb:wipe- We can use this to clear out our database tables, views, and types
MAKE
make:factory- Used to make a new factory filemake:model- Used to create a Lucid Modelmake:seeder- Used to create a seeder file
MIGRATION
migration:fresh- Will drop all our tables and their data and re-migration all our migrationsmigration:refresh- Will step through each migration undoing it, then re-migration eachmigration:reset- Will step through each migration undoing itmigration:rollback- Can undo each migration to a specific batchmigration:run- Will run any migrations that haven’t yet runmigration:status- Can be used to view the current status of our migrations
