When it comes to forms, it’s important to remember InertiaJS keeps us within the Single Page Application (SPA) environment. So, we don’t want to do a normal HTML-based form submission. However, it’s also perfectly possible we’d like to redirect or update items on the page as a result of our form’s submission.
To aid with this, Inertia has its own form submission processes that’ll ultimately submit our form as an asynchronous HTTP request. Then, it’ll utilize the response to update our page accordingly.
Form Submissions with the Inertia Module
The first version of Inertia’s form flow will feel very similar to the typical Vue form flow, where we capture our form’s submission and kick-off a request using the Inertia module, which works similarly to fetch and Axios.
Let’s start by getting a form added to our Register page.
<template> <!-- resources/js/Pages/Auth/Register.vue --> <div> <h1>Register</h1> <form @submit.prevent="submit" class="max-w-sm"> <n-input type="email" v-model:value="form.email" placeholder="Email" class="mb-3" /> <n-input type="password" v-model:value="form.password" placeholder="Password" class="mb-3" /> <n-button attr-type="submit"> Register </n-button> </form> </div> </template> <script> import AuthLayout from '@/Layouts/Auth.vue' import { reactive } from 'vue' export default { layout: AuthLayout, setup() { const form = reactive({ email: '', password: '' }) const submit = async () => { // TODO: kickoff POST request } return { form, submit } } } </script>Copied!
Here we have our registration page containing a reactive form object for our fields and a stubbed submit method. So far, nothing here is abnormal from a typical Vue 3 application.
Now, let’s import the Inertia module, and utilize it to kick off our POST request for our registration form.
<script> // resources/js/Pages/Auth/Register.vue import AuthLayout from '@/Layouts/Auth.vue' import { reactive } from 'vue' import { Inertia } from '@inertiajs/inertia' // 👈 Import the Inertia module export default { layout: AuthLayout, setup() { const form = reactive({ email: '', password: '' }) const submit = async () => { // TODO: kickoff POST request await Inertia.post('/app/register', form) // 👈 Send a POST request } return { form, submit } } } </script>Copied!
Again, nothing here looks too abnormal from a typical Vue 3 application. Everything looks as though we’re utilizing APIs to interact with our server.
However, notice we aren’t doing anything with our POST’s response. All we’re doing is waiting for its promise to resolve. This is because we can perform any redirects and even update global data directly from our server-side response, as you’ll see in the next section.
Handling Inertia Form Requests
So, we’ve learned on the client-side with our Vue application we’ll treat form communication like an API. When it comes to the server-side though we’ll want to treat things like a typical monolith application.
Let’s go ahead and define the POST: /app/register route.
Route.group(() => { Route.get('/', async ({ inertia }) => { return inertia.render('App', { testing: 'this is a test' }) }).as('index') Route.get('/login', async ({ inertia }) => { return inertia.render('Auth/Login') }).as('login.show') Route.get('/register', async ({ inertia }) => { return inertia.render('Auth/Register') }).as('register.show') Route.post('/register', async ({ request, response }) => { console.log({ registerBody: request.body() }) return response.redirect().toRoute('app.index') }).as('register.store') }).prefix('app').as('app')Copied!
- start
- routes.ts
Notice this looks the exact same as if we were using EdgeJS as our templating engine. We capture the body data, for now, we’ll just console log it out. Then, we return and redirect the user to the app’s index page. Note, I added names to each of the above routes as well to simplify redirecting.
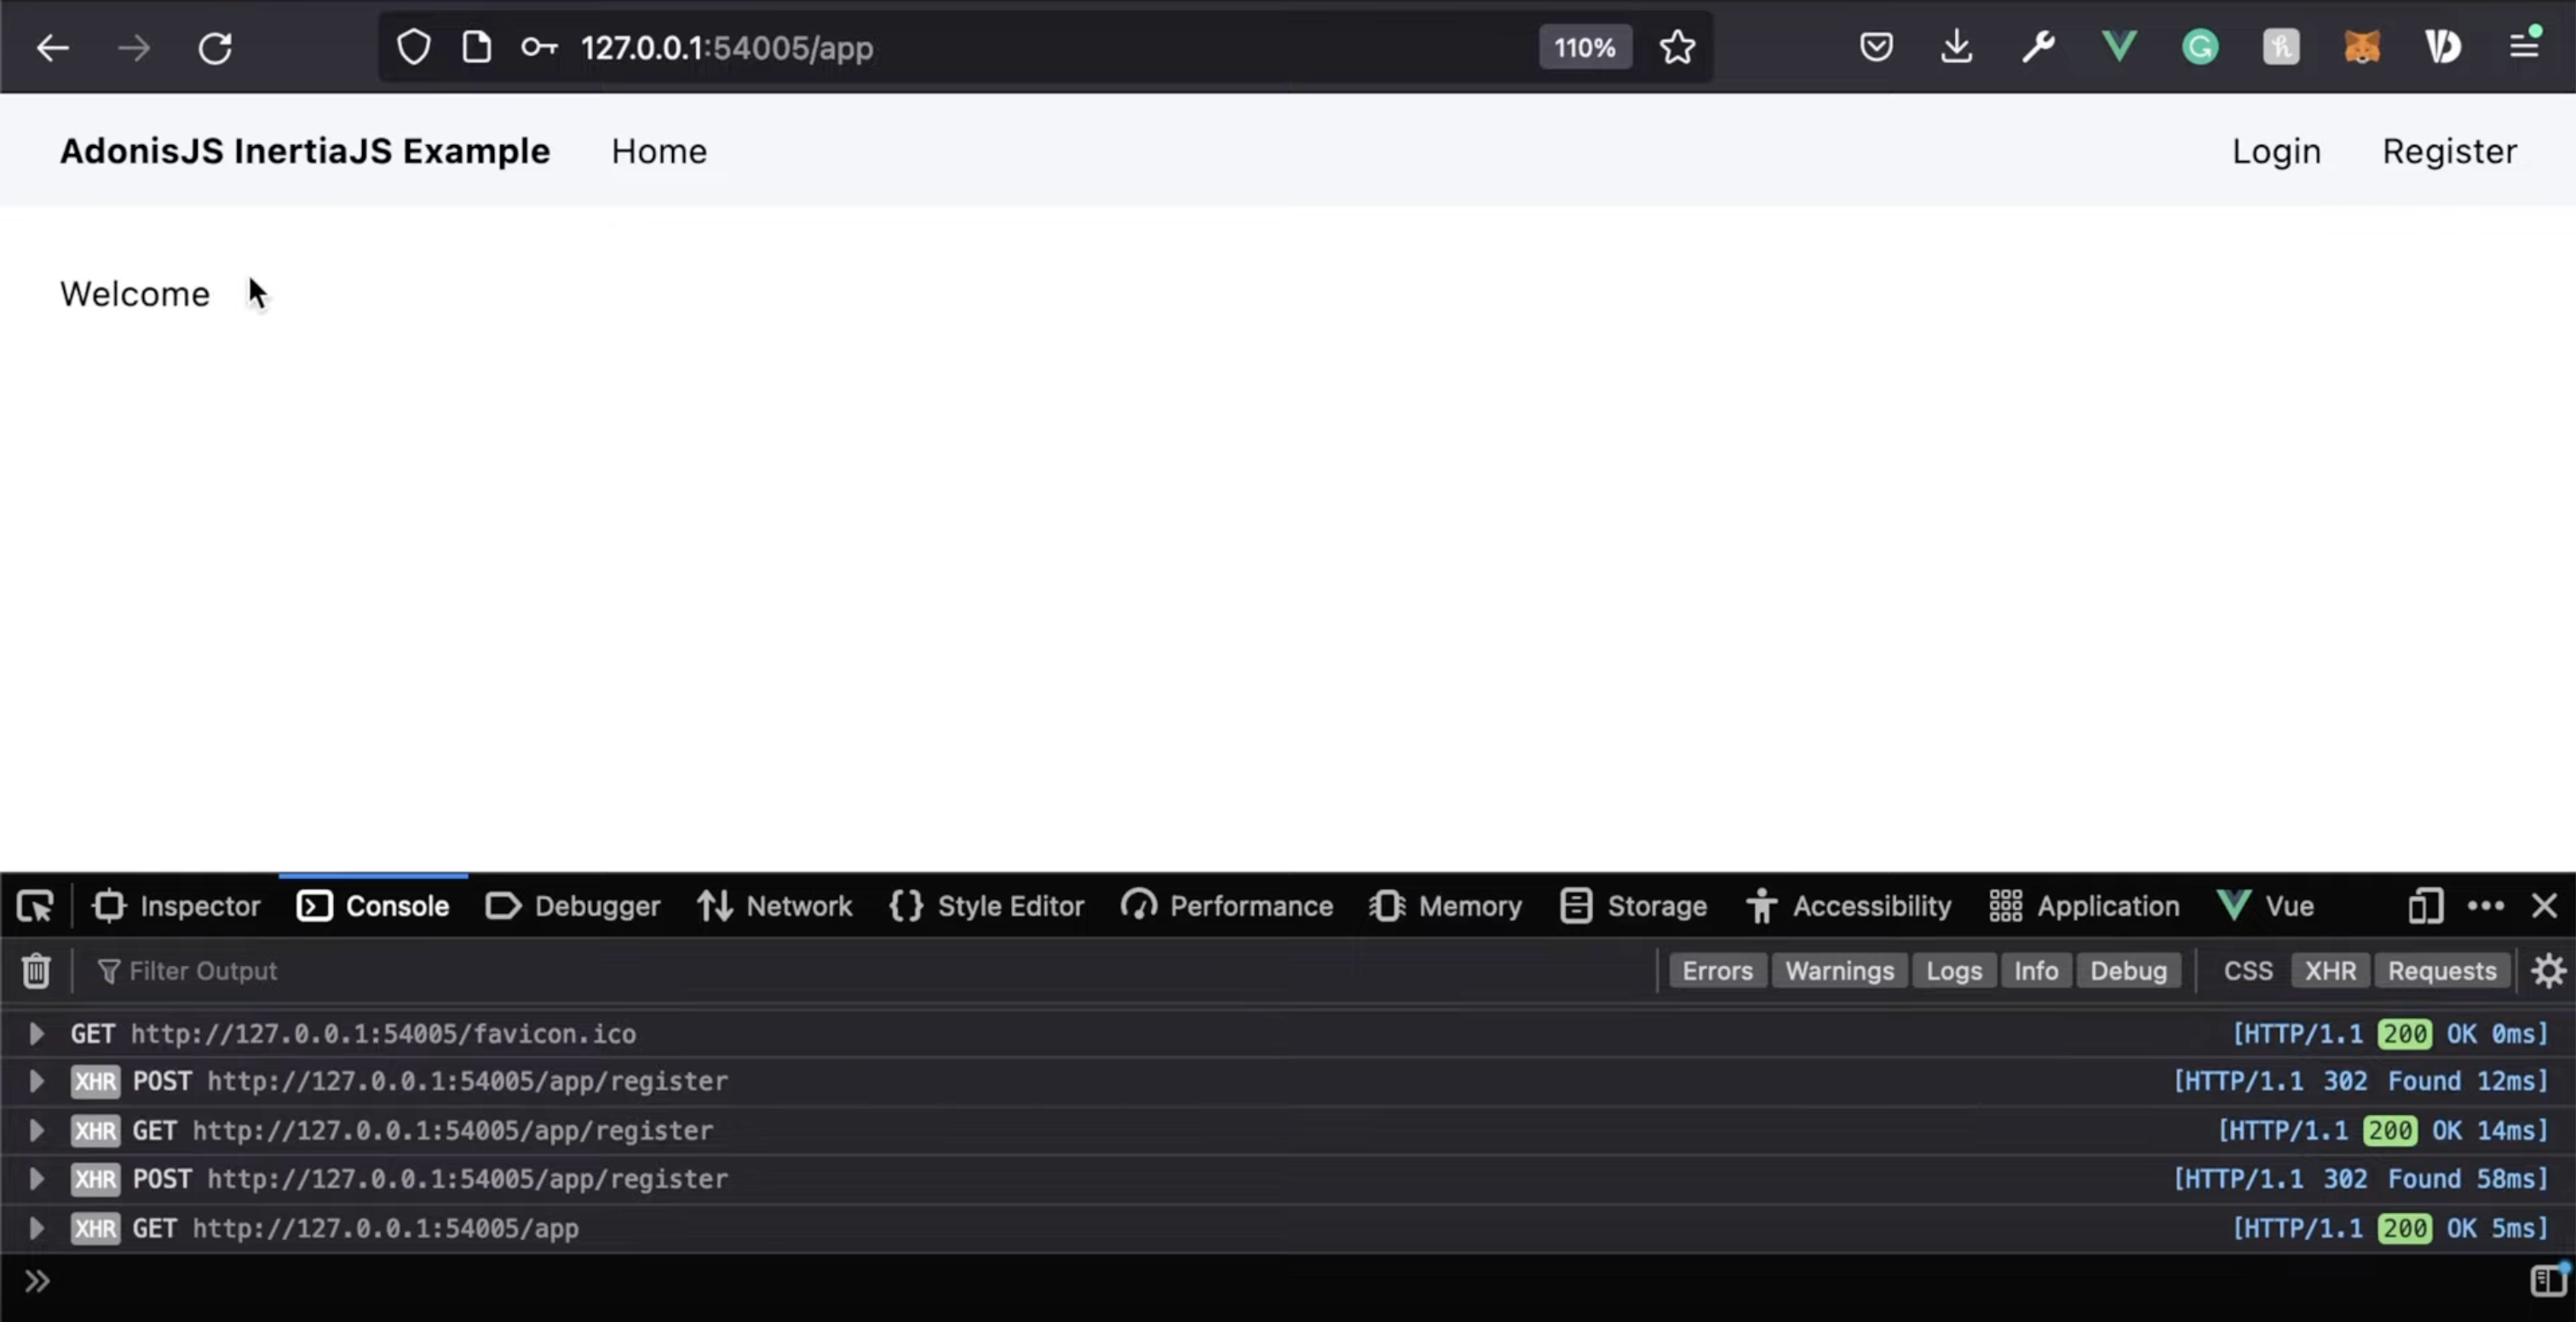
Now, when we submit our register form if you inspect the network log, you’ll see our POST request out to /app/register, on the right you can see it responded with a 302 Found and redirected us to /app via a get request. All of this was done automatically by Inertia via our route’s redirect.
InertiaJS Form Helper
InertiaJS also comes with a form helper, this is fantastic for cutting back boilerplate code for simplistic forms. Essentially, we can eliminate the usage of reactive (or ref) and our submit handler by wrapping our form’s model data within Inertia’s useForm utility.
Let’s copy/paste what we have for our Register page into our Login page, then we’ll refactor the Inertia module usage into the InertiaJS form helper usage.
<template> <!-- resources/js/Pages/Auth/Login.vue --> <div> <h1>Login</h1> <form @submit.prevent="submit" class="max-w-sm"> <form @submit.prevent="form.post('/app/login')" class="max-w-sm"> <n-input type="email" v-model:value="form.email" placeholder="Email" class="mb-3" /> <n-input type="password" v-model:value="form.password" placeholder="Password" class="mb-3" /> <n-button attr-type="submit"> Login </n-button> </form> </div> </template> <script> import AuthLayout from '@/Layouts/Auth.vue' import { reactive } from 'vue' import { Inertia } from '@inertiajs/inertia' import { useForm } from '@inertiajs/inertia-vue3' export default { layout: AuthLayout, setup() { const form = reactive({ const form = useForm({ email: '', password: '' }) const submit = async () => { // TODO: kickoff POST request await Inertia.post('/app/register', form) } return { form, submit } } } </script>Copied!
As you can see, this useForm helper allows us to eliminate a decent amount of code while maintaining all of the same functionality.
Here’s what our Login page’s component looks like after all the changes.
<template> <!-- resources/js/Pages/Auth/Login.vue --> <div> <h1>Login</h1> <form @submit.prevent="form.post('/app/login')" class="max-w-sm"> <n-input type="email" v-model:value="form.email" placeholder="Email" class="mb-3" /> <n-input type="password" v-model:value="form.password" placeholder="Password" class="mb-3" /> <n-button attr-type="submit"> Login </n-button> </form> </div> </template> <script> import AuthLayout from '@/Layouts/Auth.vue' import { useForm } from '@inertiajs/inertia-vue3' export default { layout: AuthLayout, setup() { const form = useForm({ email: '', password: '' }) return { form } } } </script>Copied!
Lastly, let’s go ahead and add in a route for our POST: /app/login as well.
Route.group(() => { // ... Route.post('/login', async ({ request, response }) => { console.log({ loginBody: request.body() }) return response.redirect().toRoute('app.index') }).as('login.store') // ... }).prefix('app').as('app')Copied!
- start
- routes.ts
Next Up
In the next lesson, we’ll learn how to add validation, handle validation failures, and display validation messages for both our Register form (using the Inertia module) and our Login form (using the useForm helper).
