Today we're going to be setting our Amplify + Nuxt site up with a custom domain. We'll be attaching our production site to the base domain (https://oursite.com) and our staging site up to a stage subdomain (https://stage.oursite.com).
Creating A Route53 Hosted Zone
First off we need to get a hosted zone setup for our domain in Route53. With this, we'll be switching the DNS Nameservers from wherever it may be now, likely whoever you registered your domain through, to Route53. This is going to allow us to easily point our Amplify application and each of its environment builds to our domain.
To get started:
Open your AWS Console
Head to the Route53 service
Click "Hosted zones" in the left vertical navbar
Click the orange "Create hosted zone"
Enter your domain name, for example, "mailiam.co" or "amplifynuxt.com"
Click "Create hosted zone"
Now that our hosted zone is created, we need to give it control over our domain by changing our DNS Nameservers.
Updating Your DNS Nameservers
Now that we've created our hosted zone, we'll need to give it control over our domain by changing our domain's DNS Nameservers to the one for our hosted zone.
While inside your hosted zone:
Expand the "Hosted zone details", this should reveal your Name servers over to the right
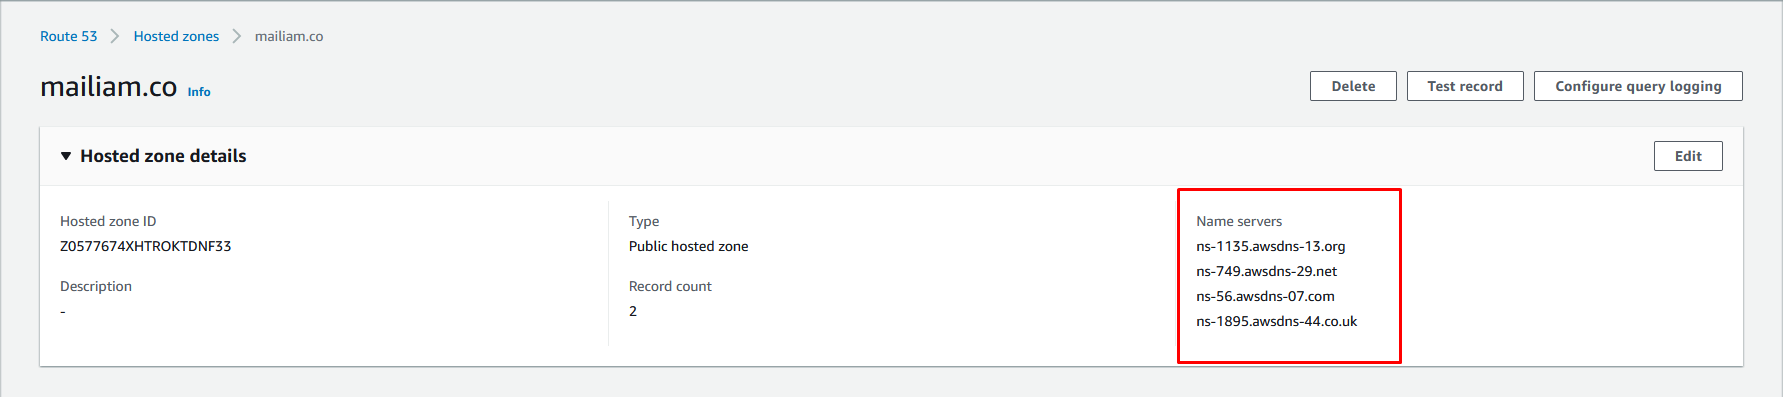
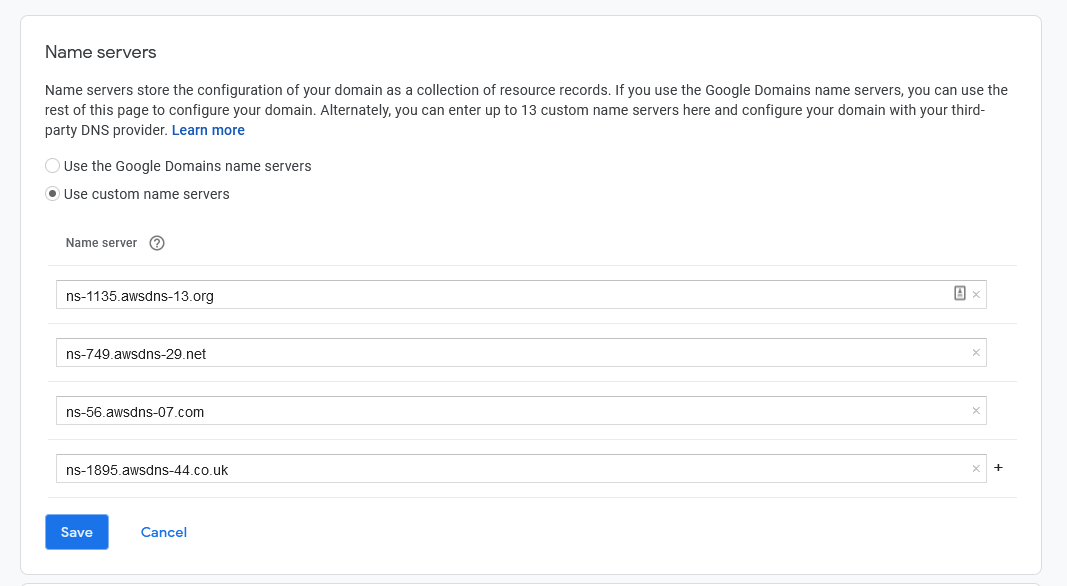
Login to the service your domain is registered through, mine is registered through Google Domains
Find your domain
Enter into the DNS section of your domain's management
Update your name servers to match what your hosted zone provides in Route53 & save.
 ⏲️ Note that this can take up to 48 hours to update. However, there's no need to wait for this to happen to continue onward in the lesson.
Make sure to move any DNS Records that you need that are on your previous Name server provider over to your Route53 hosted zone. You can create a new record in your hosted zone by clicking the orange "Create record" button and following the flow.
Binding Our Domain To Our Amplify App
Now that we have our hosted zone created and our domain in the process of switching over to our hosted zone for DNS management, we're ready to bind our Amplify application to our domain.
So let's head back to the Amplify Console:
Under "Services" search or find "AWS Amplify" and click on it
Find the application you want to add this domain to, mine is "amplify-nuxt"
Under "App settings" in the left vertical navbar click "Domain management"
In the top right corner click "Add domain"
In the domain, select click the domain you just added
Click "Configure domain"
Here we're being asked which Amplify environment we want to bind to our root domain, if you've been following the Amplify + Nuxt series, click "production" for both https://yourdomain.com and https://www.yourdomain.com.
Next, we'll want to give our staging environment it's own subdomain, so click "Add"
On the newly added line, change the subdomain to whatever you'd like. I'll be using "stage" and make sure the Amplify environment is setup to your stage environment, "master"
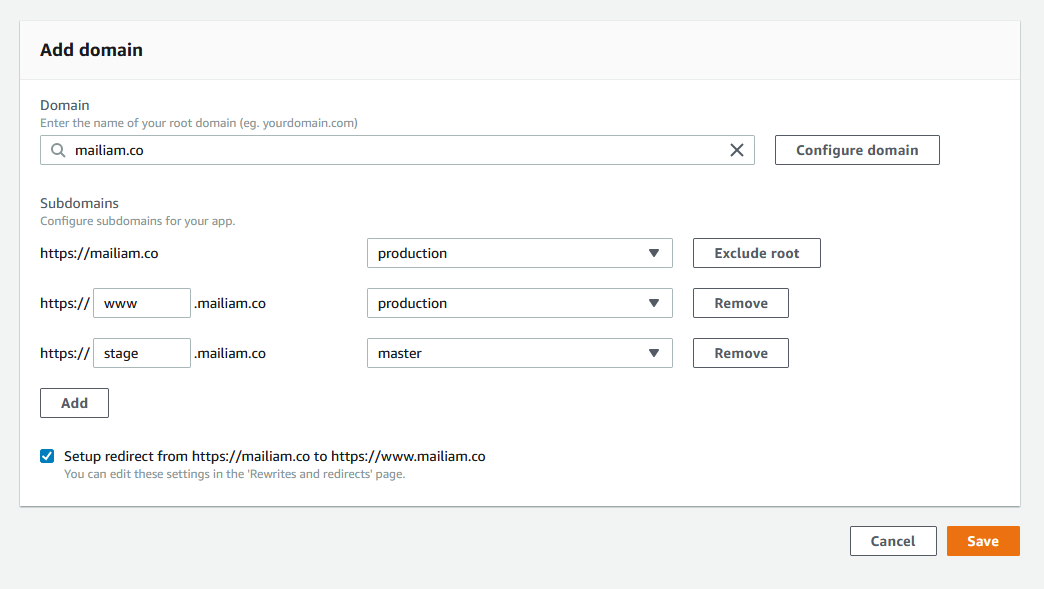 You should have something like the above
Click "Save"
You should've been redirected back to your Amplify application's "Domain management" page and you should now see your custom domain listed here.
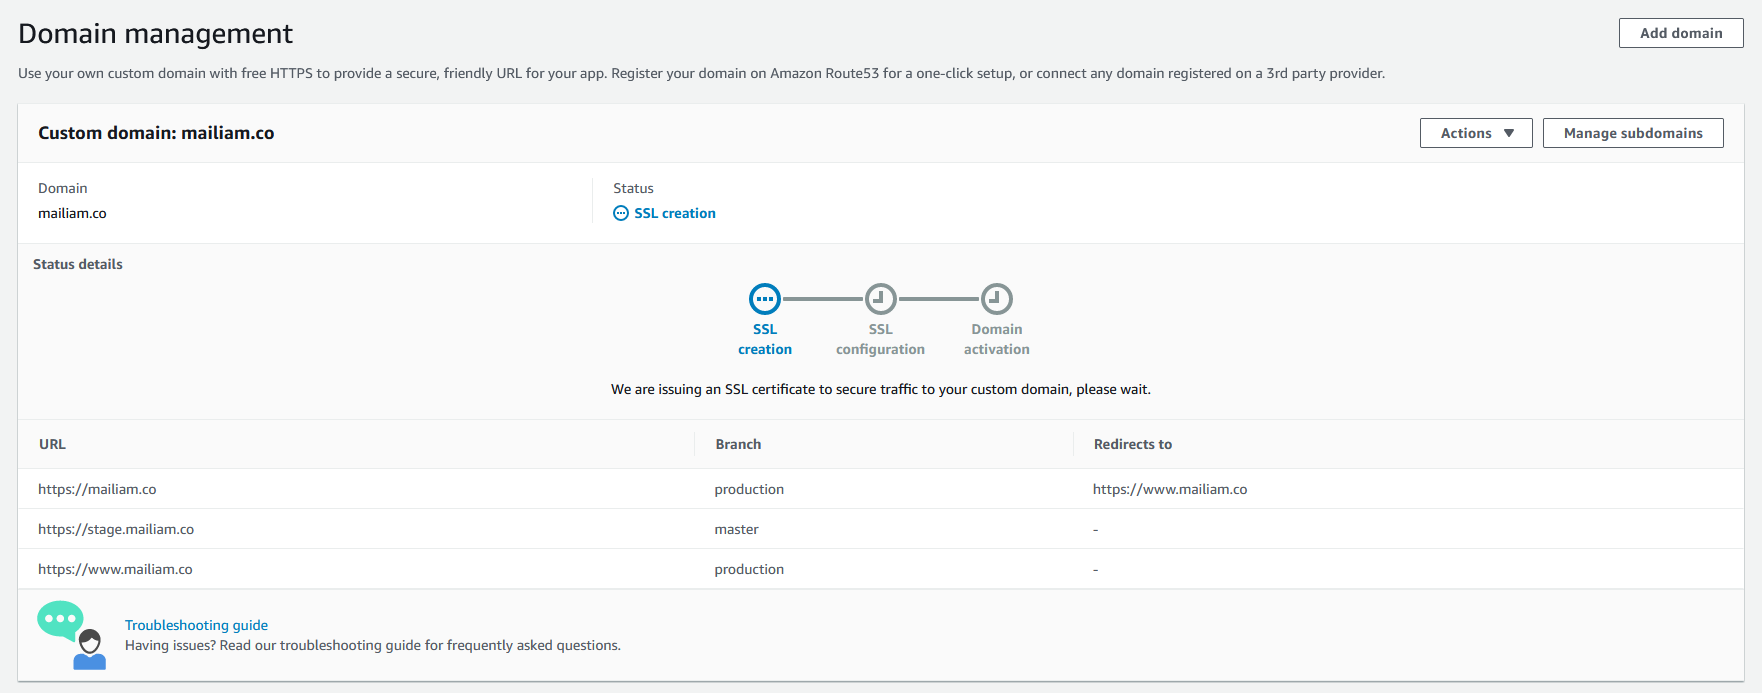 Once you've reached this page, you'll be on hold until your DNS name servers update to the ones specified in your Route53 hosted zone. Once the SSL Creation succeeds, it will ask you to update the CNAME record in your DNS to verify ownership. However, this will automatically happen for you whenever your name servers update.
Once your name servers do update you'll be placed on hold again while AWS does its thing.
 Once this is complete your domain status should change from "Domain activation" to "Available". Whenever you see this, you're good to go! You can visit your domains and see your stage and production applications.
